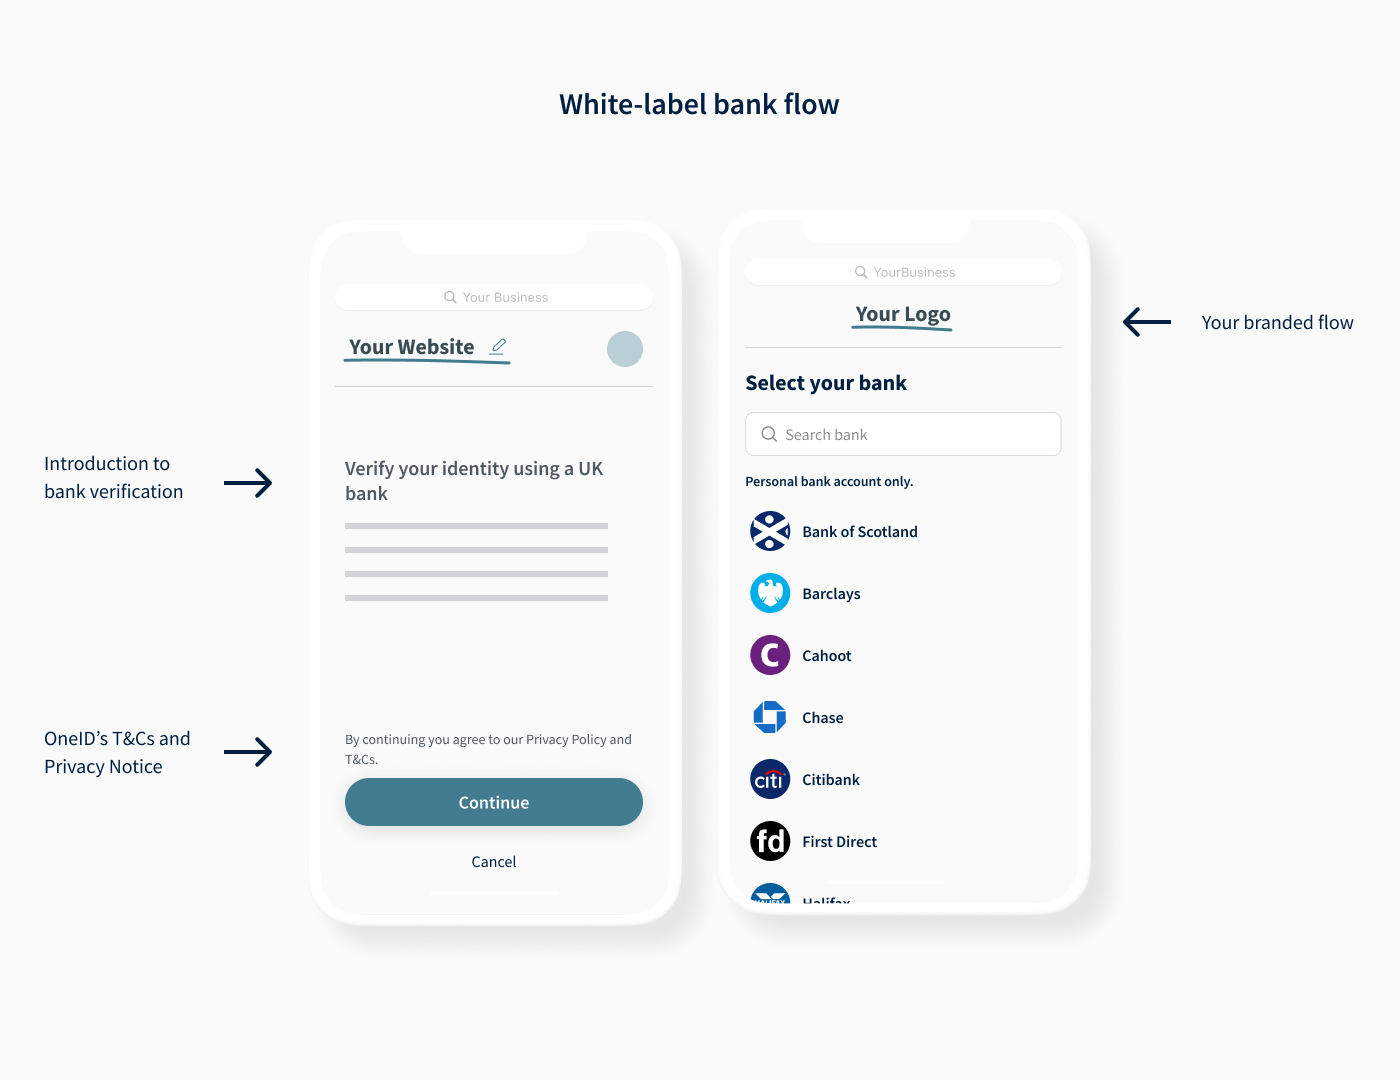
▶️ Start the OneID journey
Users should begin the OneID verification journey by selecting a clear call-to-action on your page that redirects them to the OneID verification flow.
We recommend making this action prominent and using language that clearly explains what will happen next, such as "Verify your identity", "Verify with OneID", or "Continue", depending on your user journey.
Styling your call-to-action
OneID does not provide a button component for integration. If you choose to add a button or link to launch the redirect journey from your application, style it to match your brand and maintain a consistent user experience.
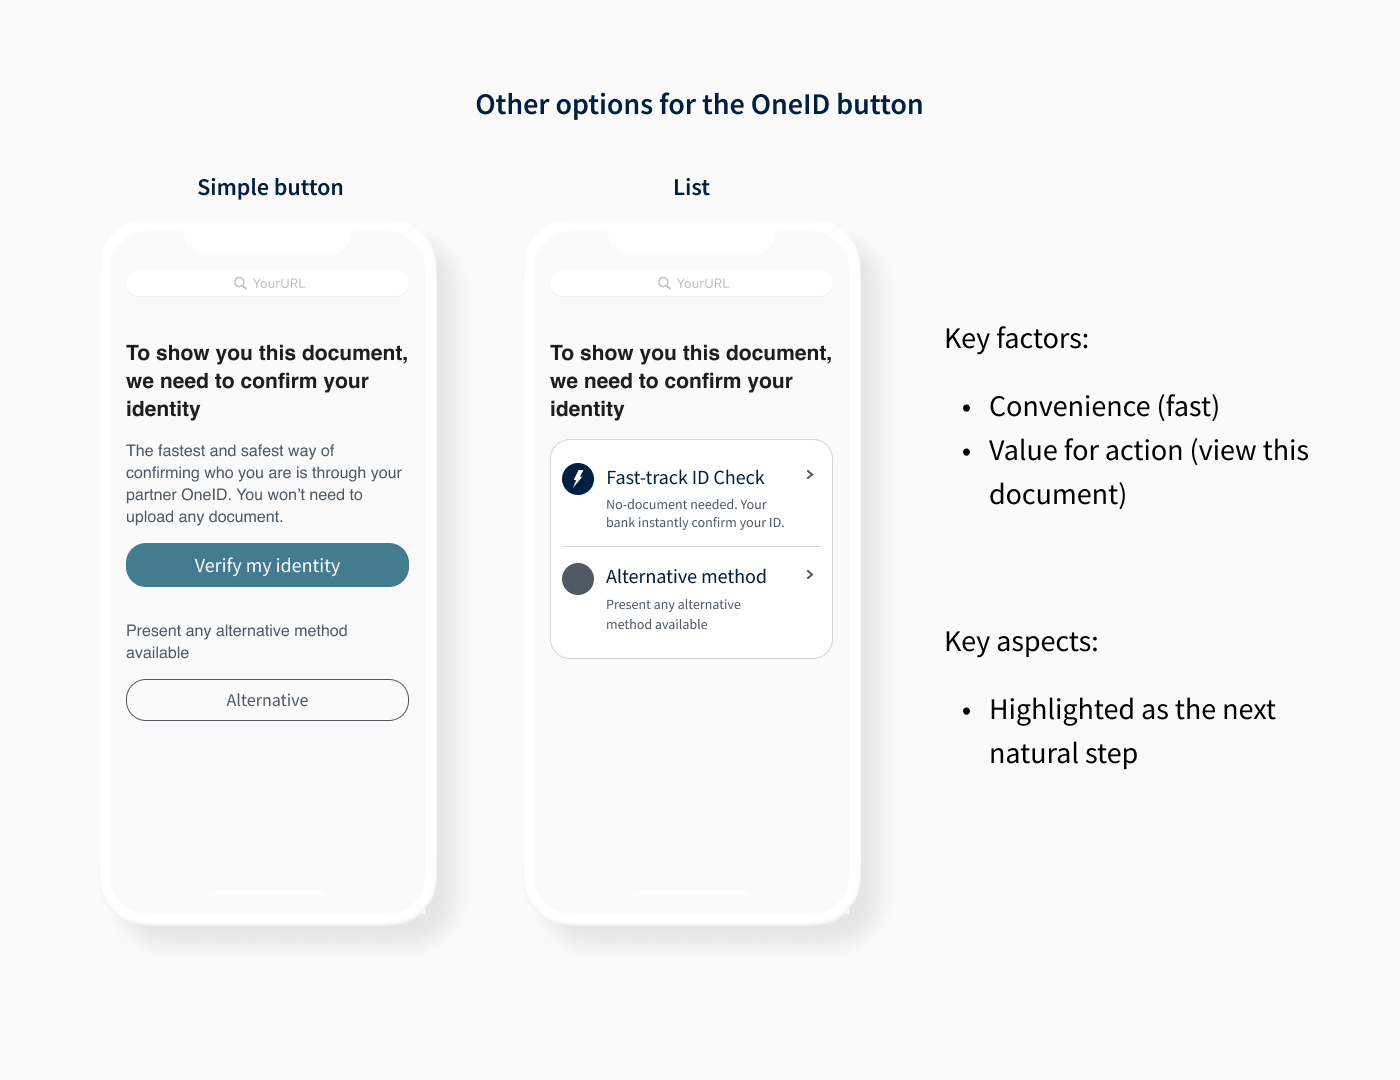
Use clear, action-oriented text and ensure the button is easy to identify as the next step in the verification process. To help users feel confident before leaving your site, you may also want to explain the benefits of the verification process, for example:
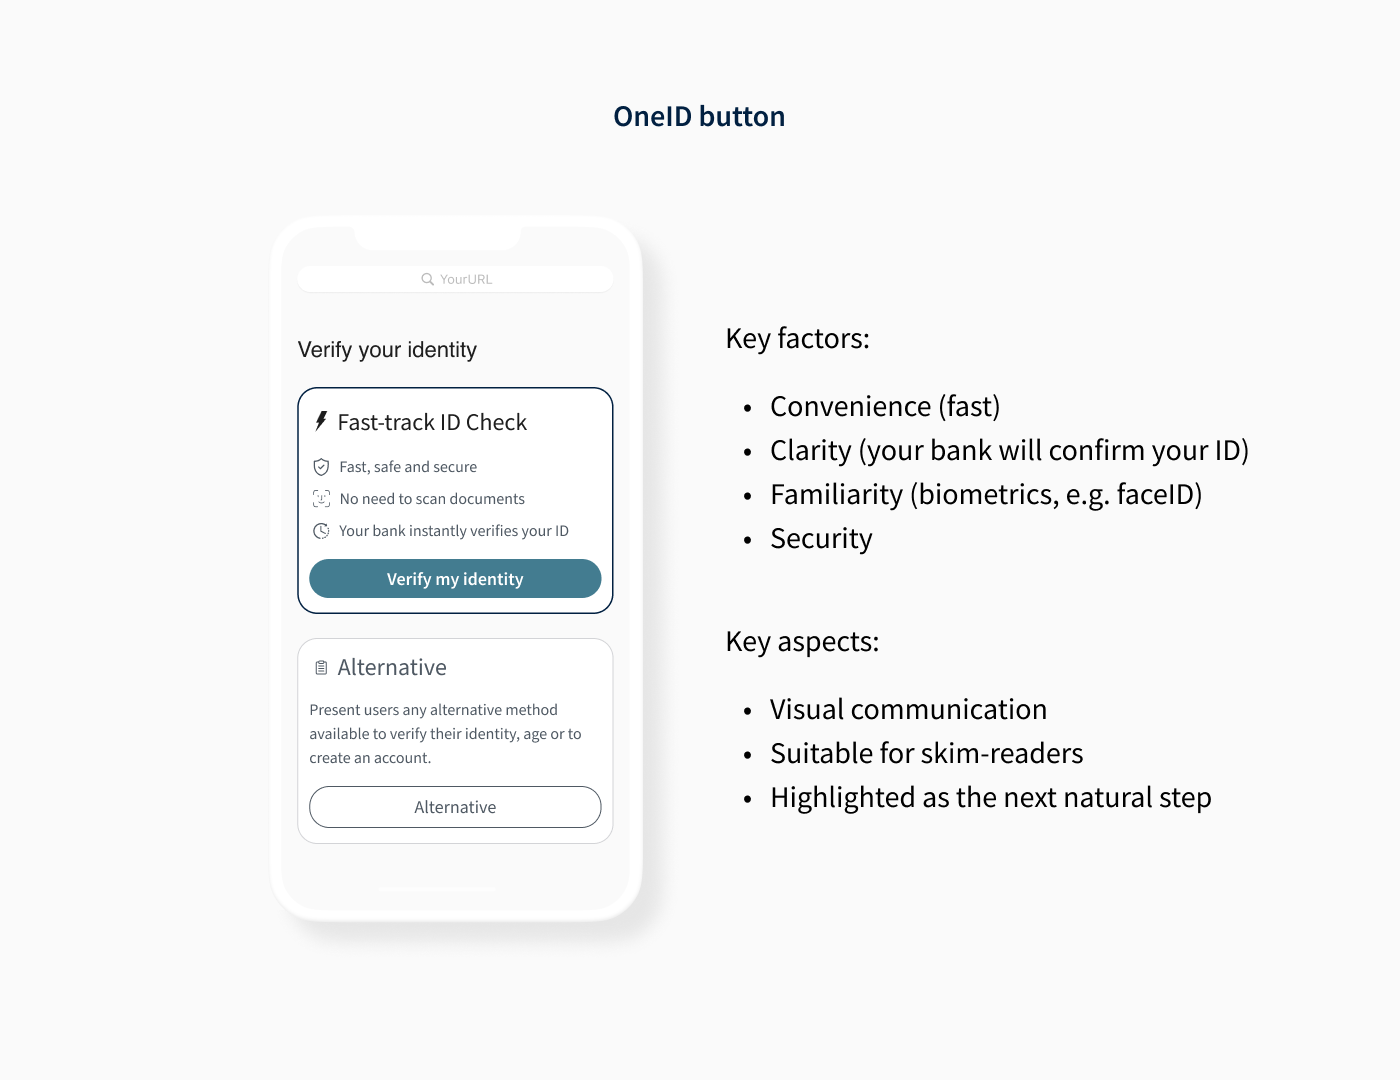
or
🔖 Add your logo
From an end-user perspective, the transition between two different brands risks creating a disjointed and confusing user experience, which might lead to abandonment. By adding your logo to OneID®, users are reassured they are in the right place.
Follow these steps to ensure your logo is added correctly:
Prepare Your Logo:
Ensure it's either SVG or PNG format. SVG is preferred for the best resolution.
The designated area for your logo is 36px high by 200px wide.
Add the Logo:
Email your logo to askus@oneid.uk and we’ll add it for you.
⏎ Return message
First-time users might be unsure whether their document-free verification was successfully completed or not. To clarify this, we have created standard messages that you can add to your Return URL:
Success
Thank you for verifying your identity. You can now continue to [next steps].
Failure or Error:
Unfortunately we could not verify your [identity/age/details]. Please continue to [alternative method / next step].
Unfortunately we could not verify your [identity/age/details] through your [bank/mobile network/document/oneid]. Please continue to [alternative method / next step].
🗂️ Layout
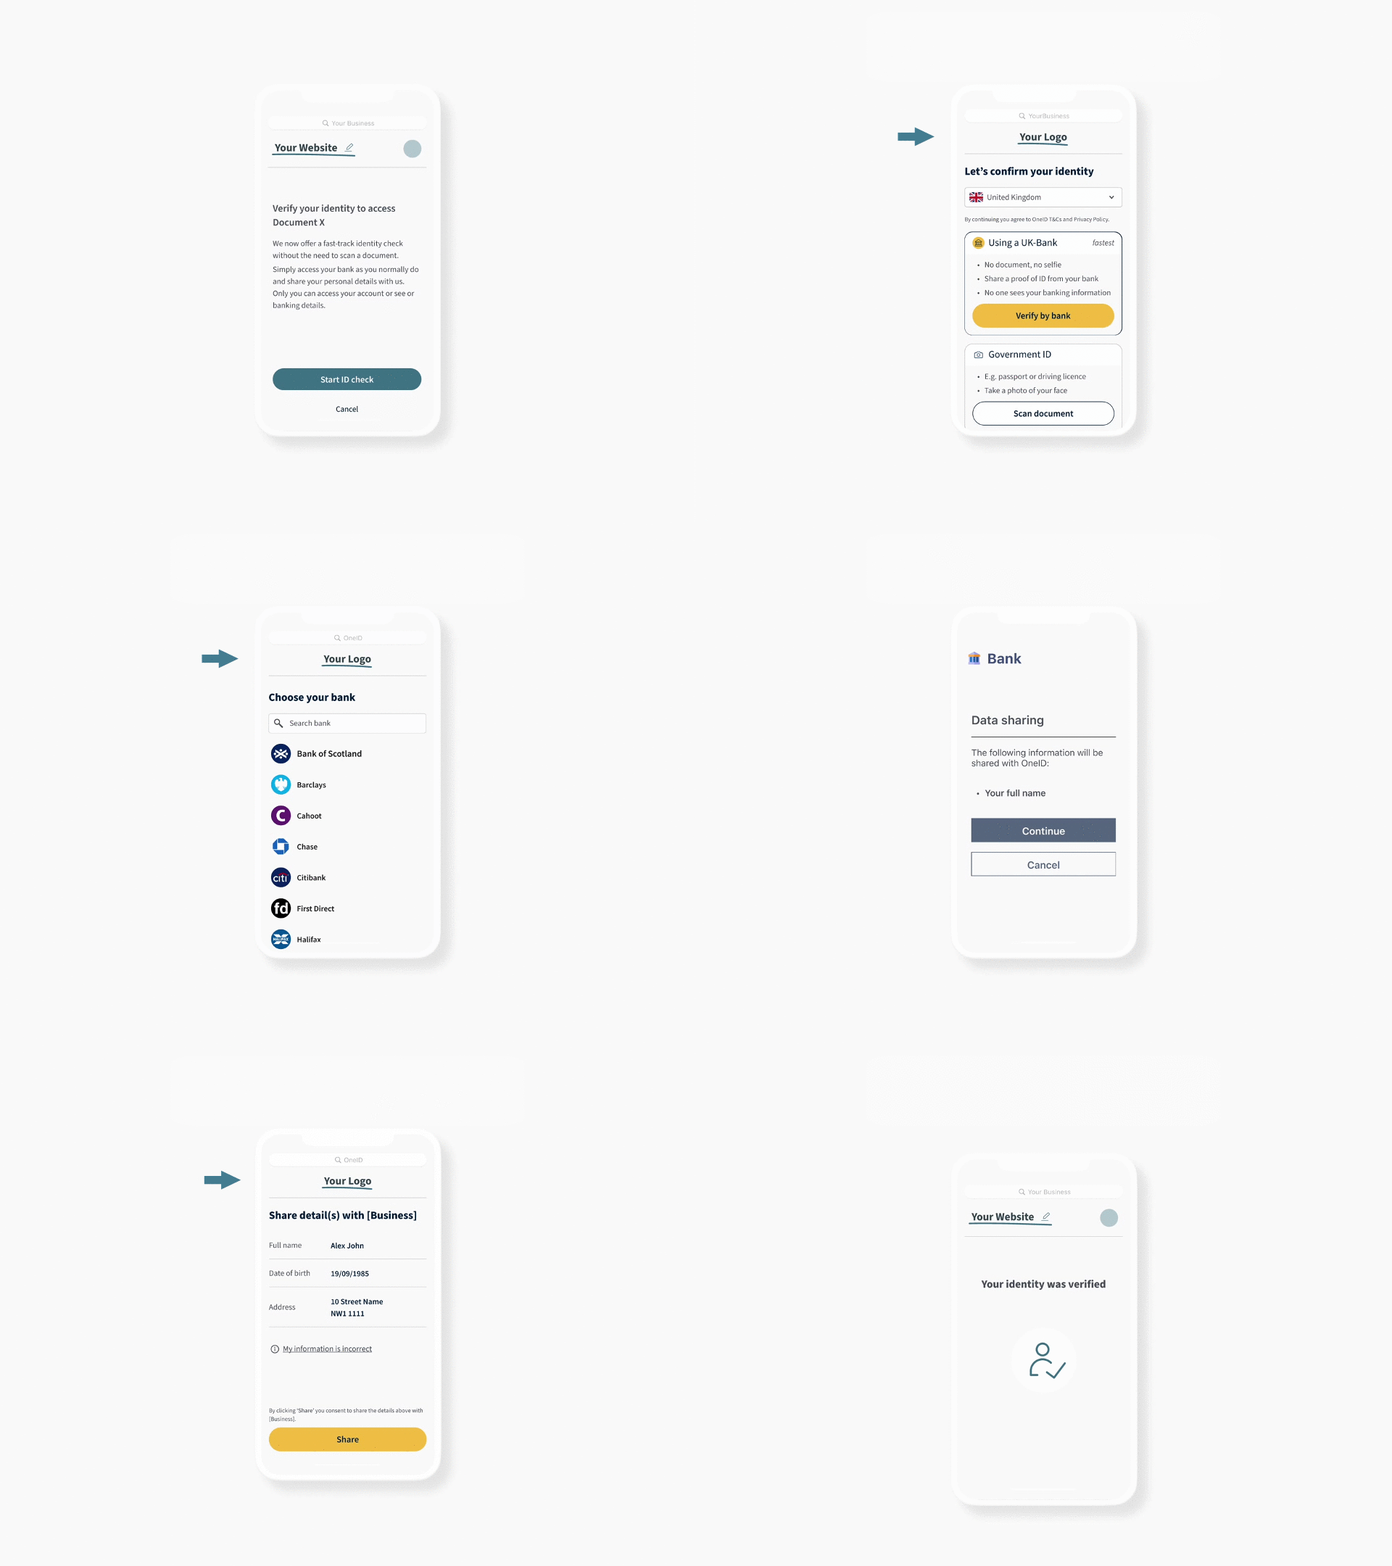
When users click to start their verification with OneID, they are automatically redirected to a new tab rather they are on mobile or desktop. Once verification is complete (or the journey ends), the user is returned to your application to continue their journey.
Why open a new tab?
This provides a consistent and reliable user experience across desktop and mobile devices. It also ensures users can complete verification securely before returning to your application.
When designing your journey:
Clearly explain that users will be redirected to OneID to verify their identity.
Use a prominent call-to-action, such as Verify your identity or Continue.
Preserve the user's progress so they can continue seamlessly when they return to your application.
Handle successful, unsuccessful, and cancelled verification outcomes appropriately when the user returns.
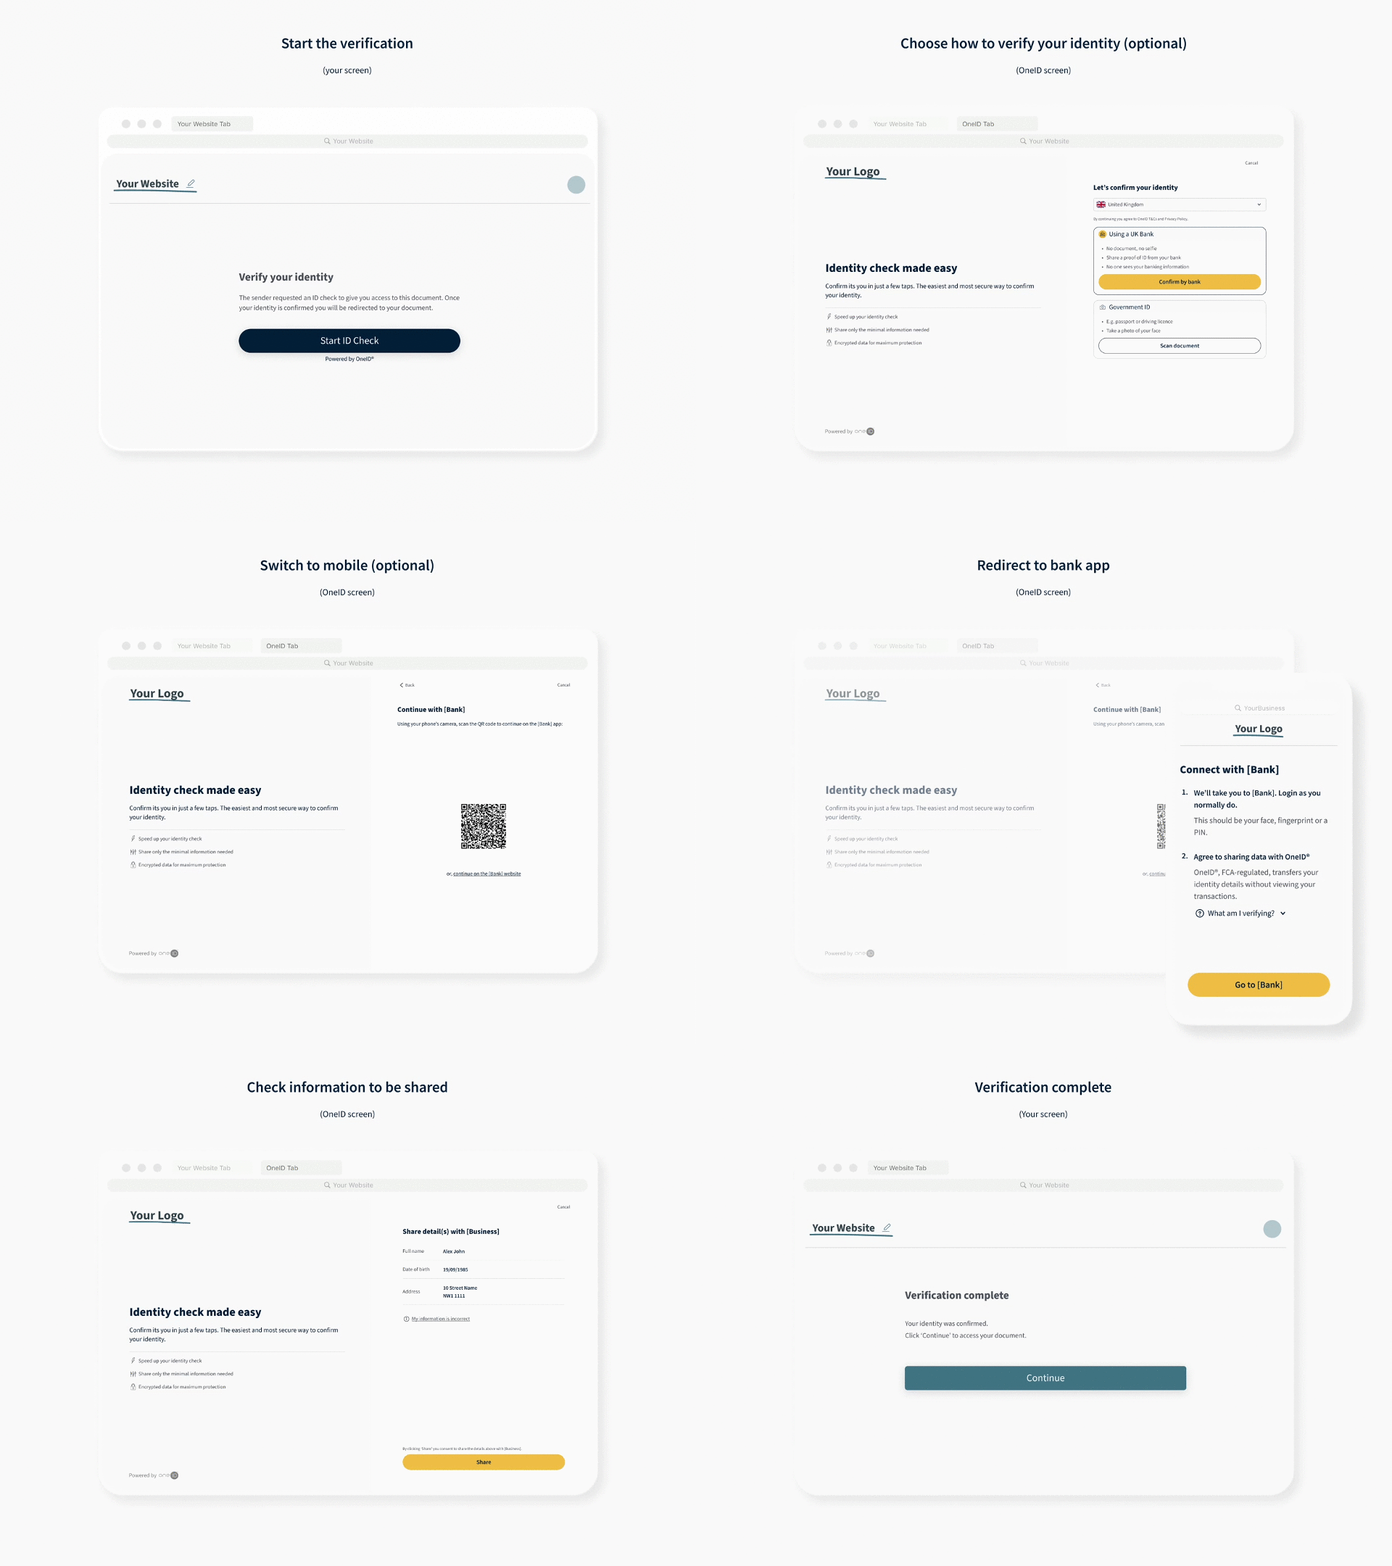
Standard vs white label
Our standard journey reduces discontinuity whilst mentioning OneID in strategic key decision points. As OneID acts as a facilitator between you and your customer's bank-held information, banks will ask users to share their data with OneID. For that reason, OneID is mentioned when handing users off to their bank.
However, we understand your business might need the OneID technology only. Our white-labelled journey minimises references to OneID from the user journey. If you choose this format, please note that you will need to collect the T&Cs and Privacy Notice consent in your flow.
Customisation
Currently, you can customise the flow by:
Replacing the OneID logo with your own;
Removing references to OneID throughout the user journey.
We don't currently support full brand customisation. If full white-label branding is a requirement for your integration, please contact a member of our team to discuss potential solutions.
Terms & Conditions Positioning
Regardless of which verification method you're integrating, White label customers are required to incorporate OneID's Terms & Conditions (T&Cs) into their user flow, before users begin the OneID verification journey.
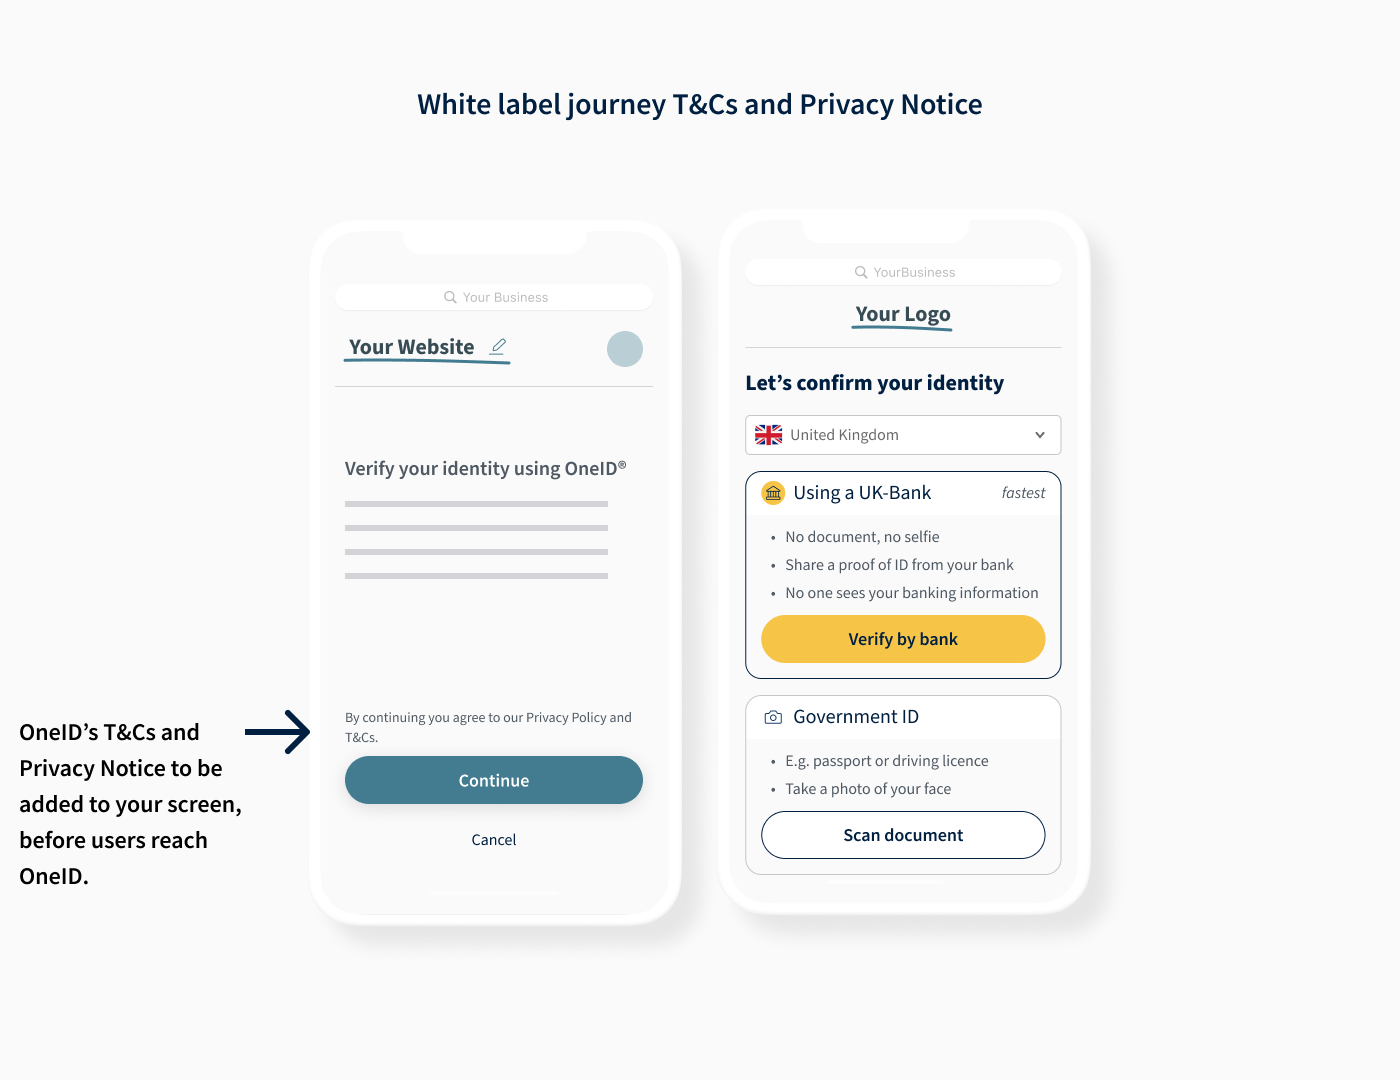
Bank verification flow
White-label flows integrating OneID’s bank verification skip the default OneID introduction screen and start directly at the bank selection interface, unless you choose to offer users an alternative verification method. This approach allows your business to introduce the bank verification step in a way that fits your brand and user experience.
It's important to note that when users reach their bank's interface, they will still be asked - by the bank - to share their data with OneID. To minimise the risk of user drop-off at this stage, we recommend proactively informing users about this step in your pre-verification messaging, at a time and place that fits naturally within your flow.