Change your installation method
- In your Shopify store admin select the Apps option from the left hand side toolbar.
- In the pop up select OneID which will be listed under Installed Apps.
- At the top of the OneID Dashboard we display the current installation method e.g. OneID widget is installed using Pre-Checkout. Click this to change the installation method.
- The Widget Install Methods page lists all of the options for install which are available based on your Shopify store type, along with a brief description of each install method.
- To change the installation method click on the button of the method you wish to choose and follow the instructions. Note: When changing between installation methods it is recommended to delete any previously inserted code snippets or sections used on the current installation method.
Product tagging
Tag existing products with a OneID age restriction
- In your Shopify store admin select the Products option from the left hand side toolbar.
- Click the title of the product you wish to add a OneID age restriction tag to.
- On the right hand side section titled Product Organisation, input ONEID_OVER_18 in to the Tags field;
- Click the + Add icon to add the tag.
- At the top of the screen click the Save button to save changes.
Bulk tag existing products with a OneID age restriction
- In your Shopify store admin select the Products option from the left hand side toolbar.
- Use the check boxes to select all products you wish to add a OneID age restriction tag to.
- On the drop down menu titled More Actions select Add Tags.
- Input ONEID_OVER_18 in to the search field.
- Click the Save button to save changes.
Enable post-checkout verification
What is post-checkout age verification?
If customers can’t be verified during checkout, they’ll receive an email inviting them to verify their age after completing their purchase. A reminder email will be sent 24 hours later if they haven’t completed the verification. This works for orders that have either not passed initial verification, as well as express checkouts that bypass Shopify checkout (e.g. Apple Pay, Google Pay, Buy it Now, etc.).
You’ll receive email notifications and order tags when verification is pending or completed.
For customers who pass the silent check during checkout, nothing changes, ensuring a seamless experience.
Enable post-checkout verification Simply go to the OneID® dashboard and enable post-checkout verification to take advantage of this new feature - ensure that the settings mirror the below:
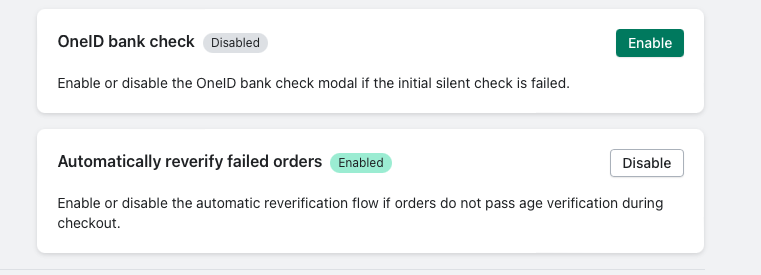
Enable/Disable bypass
Enabling the bypass option will give users the option to skip the age verification process. This should only be enabled if you wish users to have the option to contact your customer services to complete an age verification check manually.
- In your Shopify store admin select the Apps option from the left hand side toolbar.
- In the pop up select OneID which will be listed under Installed Apps.
- Select Settings from the left hand side toolbar which will open the Settings page.
- The option titled Widget Bypass Button allows for the bypass feature to enabled or disabled.
- Enabling the bypass feature will give users the option to skip the OneID check and continue with their checkout without having proven their age. Please note that the responsibility for verifying the users age by another means remains with the merchant.
- Disabling the bypass feature means that all users must complete the OneID journey to prove that they are over the age required for the restricted item. The user will be unable to continue with their checkout unless completing the OneID journey.
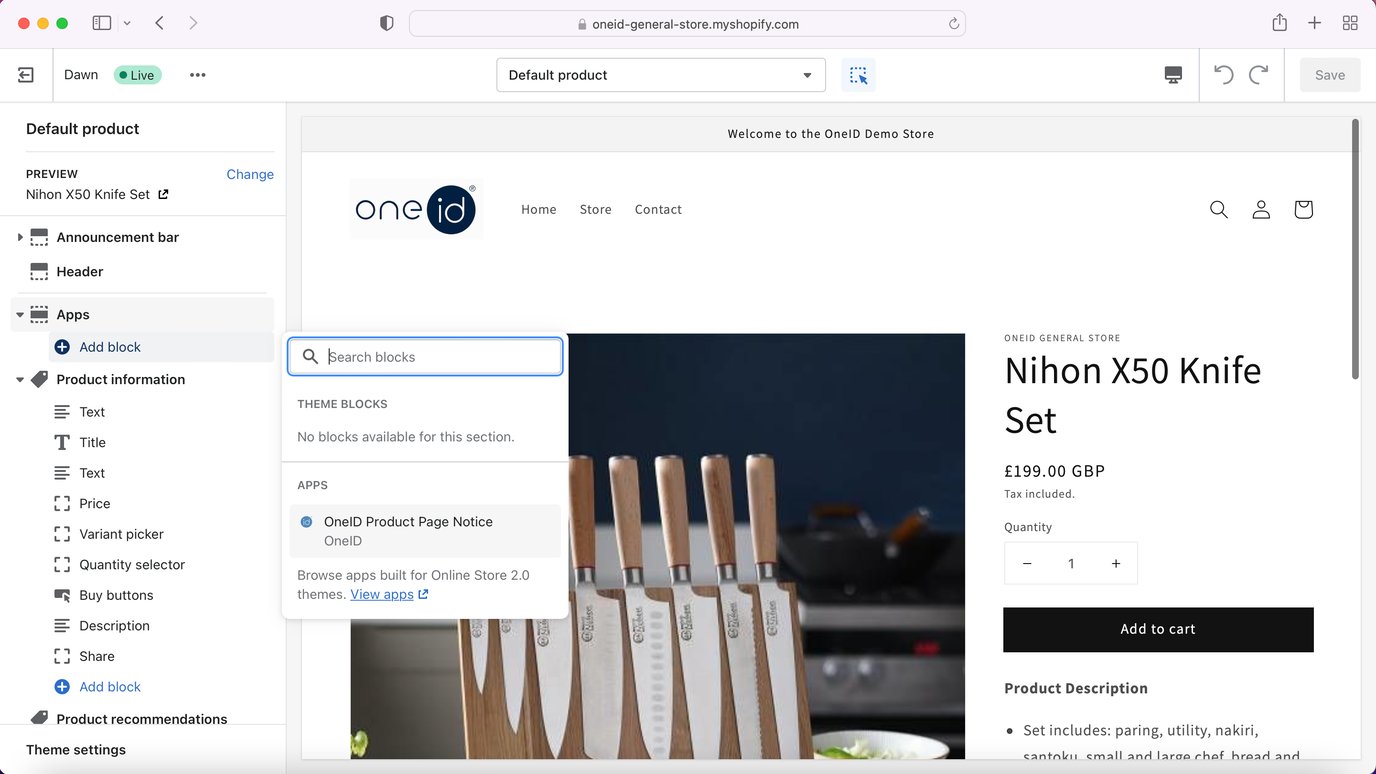
Add OneID notification to Shopify product pages
We recommend adding a notification into your product listing pages to advise customers that the item is age restricted and that an age verification check will be required to complete the purchase.
- In your Shopify store admin select the Themes option from the left hand side toolbar under the Online Store menu.
- Click the Customise button in the Current Theme section.
- From the drop down menu at the top centre of the page select Products and then the sub-option Default Product.
- Under the Apps section of the left hand side menu click the + Add Block button.
- In the pop up menu select the option listed under Apps titled OneID® Product Page Notice.
Check if the OneID Shopify Plugin is enabled
- In your Shopify store admin select the Apps option from the left hand side toolbar.
- In the pop up select OneID which will be listed under Installed Apps.
- At the top of the OneID Dashboard notifications will inform if the app is enabled and the current installation method used.
- Clicking the enabled notification, or selecting Settings from the left hand side toolbar, will open the Settings page where you can enable and disable the apps options as appropriate.